Is it high time you did something about that old, aging roof of yours? Considering the purchase of a home that will need a new roof soon? Don’t be intimidated. In this article, we’ll be discussing how to put fiberglass shingles on a roof!
The right material choice and the proper installation will reward you with a high-quality roof that will last for many decades to come.
Benefits of Fiberglass Shingles
Fiberglass shingles are a reliable, low-maintenance, and resilient way to shingle your roof. They are also an eco-friendlier option due to using less asphalt in their composition than traditional organic asphalt shingles.
Most notably, they are highly water-resistant and fire-resistant, making them a great tough, and non-porous option for most roofs.
While they don’t leak often, their simple design and durable surface make it easy to spot leaks by taking a quick surveying walk on your roof every so often.
Fiberglass shingles, in general, are fairly easy to install, in part due to their lightweight nature. A capable DIYer should be able to manage a fiberglass roof installation project.
Installing fiberglass shingles is also more cost-effective than other roofing methods. Sometimes, the installation of fiberglass shingles can even be done over the prior roofing surface (unless two or more layers of prior roofing materials already exist).
Comparison of Fiberglass Shingles
So what’s the difference between asphalt and fiberglass shingles? Fiberglass shingles are actually composed of asphalt as well, and when most people today say “asphalt shingles,” they are actually referring to fiberglass shingles.
You will often see the terms used interchangeably. However, asphalt shingles can also refer to organic shingles.
Traditional asphalt shingles (also called organic shingles due to their base composed of organic wood materials) have been waning in popularity in recent years and have, for the most part, fallen out of use.
Their organic core is highly susceptible to rot and water damage. This paper base understandably also leads to a lower fire protection rating. They are also much heavier than fiberglass shingles, which makes them more difficult to work with.
Fiberglass shingles are created with a woven fiberglass base as opposed to a wood-based one. This base mat is then covered with waterproof asphalt and granules of ceramic that help shield your roof from UV rays.
Since the only difference is in the base, fiberglass and traditional asphalt shingling look identical as a finished product.
Fiberglass asphalt shingles are more expensive than organic asphalt shingles – but for a good reason. Their value as a roofing material is greater due to their increased durability and longevity.
While a traditional asphalt roof may last only 10-15 years, and installation using fiberglass shingles can stretch the life of your roof a great deal – ranging anywhere from 25 to 50 years! This makes the increased cost well worth it.
However, there is one downside. Fiberglass shingles do not perform well under consistently low temperatures, making them a less than ideal option for frigid climates.
Those in cold and dry climates may get longer-lasting use from using organic shingles, while those living in warm and humid climates will find greater benefit from choosing fiberglass.
Difference Between Architectural Shingles and Three Tab
All fiberglass or organic asphalt shingles come in 2 types – Architectural or 3-tab. Architectural shingles (also known as laminated shingles) give a layered look to your roof while 3-tab shingles are more of a basic flat design.
Architectural shingles are used most often on higher-end homes or in hurricane-prone areas. In addition to providing a home with improved aesthetics, they are heavier than 3-tab and provide better wind resistance. (Most laminated shingles can provide protection in winds upwards of 80-120mph.)
In general, the higher the warranty rating – the more expensive the product. A top-of-the-line laminated shingle may cost twice as much as your basic 3-tab shingle – but will provide up to a 50-year warranty!
3-tab shingles are still a great investment for your roof, while also being cheaper and easier to install. If you don’t need superior wind-resistance and don’t care much for the aesthetics, a 3-tab shingle will get the job done for around 15 to 20 years.
Fiberglass Shingle Installation Guide – The Basics
Installation is always done from the lower edge of the roof, working up towards the peak. You will then overlap your layers by nailing the next section about two-quarters of the way up the previous section of the material.
Each run of materials is called a “course.” You will continue with each new layer, repeating the process – most likely in a staggered or pyramided pattern as required by the manufacturer.
Step #1: Prep
Have your materials ready and be sure your measurements are correct, so you don’t end up with a shortage of roofing materials. Prep your roof’s surface for installation by making sure that your roof is free of any debris from the previous roofing system and is ready to go.
Nail down any protruding nails from the decking. Check your local codes to find out if underlayment should be applied over or under your drip edge.
And most importantly – don’t forget to take the proper safety precautions if you plan to be up on your roof installing your shingles. 1/3 of all construction fatalities are from falling off of roofs.
Step #2: Drip Edge
The installation of a drip edge allows the water to drain freely off the edge of your roof. It also protects your roof from insects, wind-driven rain, and other pesky problems.
Most homeowners prefer the neat and finished look achieved with drip edge, and many building codes these days actually require it.
Drip edge is applied directly to the roof deck along the eaves and nailed or cemented down. Many installers also include drip edge along with the rake. In most cases, your underlayment will then be installed over the drip edge. (Check local codes)
Step #2b – Underlayment
One of the most important steps in roofing installation is the application of a roll of roofing paper and additional protections such as ice & water shield as an underlayment.
Your shingles are only one layer of defense; an underlayment provides additional protection against moisture. You’ll want to overlap your layers of underlayment by at least 10cm when laying them down on your roof.
If you are installing your underlayment over your eave or rake drip edges, you will need to glue it down.
Step #3: Lay Your Starter Course
Begin your first course of shingles at the bottom of the roof at the eave. Your starter layer will be done using narrower strips of material accomplished either by trimming some of your shingles or by using pre-cut starter shingles included by some manufacturers.
Another option is to lay a row of shingles upside down. Overhang the drip edge by about half an inch. (Some manufacturers also recommend using starter shingles up the rake edges as well.)
Step #4: Fasten
Use a nail gun to fasten down your shingles – typically, each course of material will require four nails in the middle and four nails at the top as you go. Groups of 6 nails can be used in hurricane-prone or high-wind areas for further security.
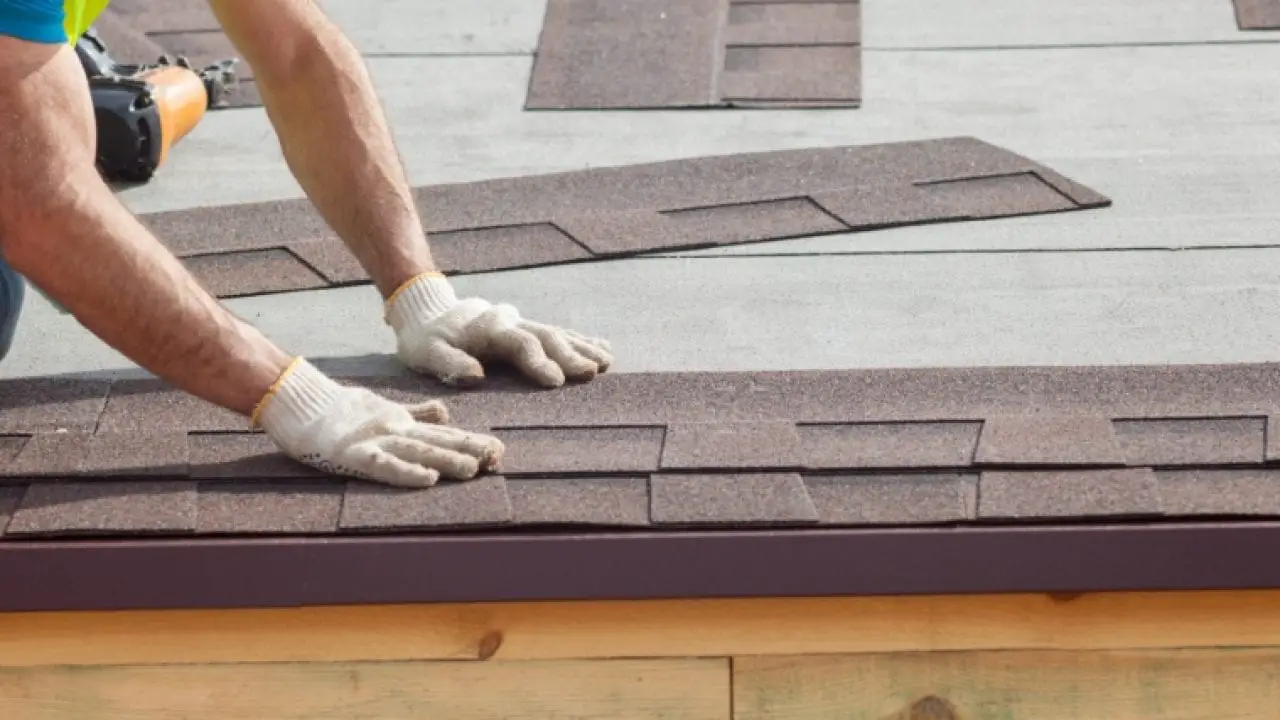
Step #5: Continue Laying
You will then start your second course with a full-length shingle laid over the starter course beginning at the bottom corner. Each subsequent layer will be staggered at a distance to create a pattern as determined by your manufacturer and accomplished by trimming the first piece in each row. (Don’t throw your trimmings away!
These trimmed portions can be used to continue the pattern vertically or to finish off a row on the opposite rake.) At this point, you’ll have the beginnings of 5 or 6 rows (depending on the manufacturer) of shingles in your first corner.
From there, simply extend each course using full-length shingles all the way across the roof. You’ll then repeat this cycle all the way up the roof. Many installers like to use chalk lines to ensure a straight installation.
Once you get the hang of it, the actual shingle-laying work doesn’t take nearly as long as one might think!
Fiberglass Shingle Installation Guide – Special Situations
The process above seems simple enough. However, most roofs are fairly complex, and even the most basic roof design still contains some tricky situations. So what do you do when you come to a joint, ridge or gable?
Luckily, with the right knowledge, these roof-laying oddities aren’t quite as difficult as they seem at first glance.
Ridge Caps
Where the roof sections meet at an angle or peak, your shingle courses will likely overlap at odd angles. To remedy this, you will trim off the excess shingle material leaving a smoother flat surface to put a ridge cap.
To install these caps, you’ll simply use special strips of shingle material that have been cut into smaller 1-foot sections. Apply and overlap as usual from the lowest point of the hip and work your way up.
Install with a slight overhang over the drip edge – and then cut flush with the drip edge.
Vents
These crucial pain points are a common source of major leaks and water damage. The installation of a rubber boot and/or metal flashing will help prevent water seeping into your roof or home.
You will then install the shingles on top of the flashing or boot, trimming them where necessary to fit around it. The most important step is the use of sealant under the adjacent shingles and even around your flashing or boot nails.
Chimneys
Just like your vents, the proper installment of roofing materials around your chimney is critical. Layers of underlayment, step flashing, and shingles will help protect this vulnerable area against water leakage or damage.
When laying down your underlayment, remember to extend it up the chimney by at least 6 inches.
Then you will generally butt your shingles up right against the chimney, apply a step flashing, and then another layer of shingles on top alternating as you continue around the chimney. Counter-flashing and mastic are then used to create a final layer of protection.
Sidewalls
At points where your roof slope meets a sidewall or gable, you will need to install a step flashing to help ease the transition and keep your roof watertight. It is worth spending the extra time on this critical junction to prevent leakage.
The outermost layer of shingles and later the siding will then cover up the flashing. (Continuous flashings can be used for the front walls)
At the corner where the sidewall meets the front wall, apply your first section of step flashing – making sure it extends slightly past the front wall for better water runoff. The shingle is then installed over the step flashing, continuing this process with each course.
Valleys
Where the roofline creates a valley, it is especially important to ensure proper installation in these areas since this is where ice, snow, and water can build up in inclement weather.
Consider extra layers of leak protection in your underlayment in these areas. The valley style will vary based on your shingle type. With all methods, you will want to avoid placing any nails within 6 inches of the valley.
Woven – With 3-tab shingles, you can use what is known as a woven technique to seamlessly blend the two sides of the valley together by overlapping the two opposing courses by at least 12 inches.
Closed-Cut – With laminate shingles, a closed-cut technique is the most popular. This method is accomplished by applying all of the shingle courses on the higher-sloped side first, making sure to cross the valley, and then applying the lower-sloped side next – also crossing the valley.
The top layer will then be cut right at the valley line (and cemented down at the edges) for a higher-end aesthetic. Trimming about 1 inch off of the upper corners of each end shingle will help direct any water back into the valley.
Open – For the less-popular open valley, you will cement down a flashing and trim the courses on either side of the valley – being sure to cut the upper corners and apply asphalt cement under the shingles at the valley.
Common Mistakes To Avoid
In general, fiberglass shingles are easy to install. But there are some common mistakes that DIYers and even roofing professionals are prone to making.
#1: Improper Nail Placement
This is a very common mistake that is easy to make when you are in a hurry or new to roofing. Although specific instructions can vary by manufacturer, most sections of shingles will require eight nails- 4 in the middle and four on the top- as you are placing the next layer.
Using too few nails or placing the nails in the wrong spot on the shingle layer are errors that are easy to make but could potentially be very costly.
Placing the nails too high on the shingle results in missing the top edge of the shingle below – leaving it loose and vulnerable to damage.
#2: Not Taking Proper Waterproofing Precautions
When you cut corners on your roof installation, it can lead to costly water damage and repairs later on down the road. For example, using continuous flashing at sidewall junctions instead of step flashing with any asphalt shingle roof will almost always lead to leaks.
Be very careful at any junction requiring flashing, and be sure to use enough underlayment in all areas.
#3: Careless Installations Around Flashings
A large percentage of all roof leaks occur around vent flashings and boots. Don’t place your nails too close to the corners and consider using a gasketed screw, which better resists loosening over time.
You can also double up on pipe boots to avoid leaks caused to rubber wear.
#4: Too Much Overhang
The shingles hanging over the edge of your roof shouldn’t be extended past the roof more than 3/4 of an inch. Any longer than this, and it leaves your roof susceptible to damage and rot – not to mention unsightly sagging.
To ensure a proper overhang, use a piece of drip edge and follow your manufacturer’s specific instructions.
#5: Attempting to Install Shingles on Flat Roofs or Roofs with a Pitch Less Than 2/12
For lower-sloped roofs and sections around skylights, etc. a different roofing type would perform better. Fiberglass shingles are not recommended in these situations because of the potential for damage due to poor water runoff.
Final Thoughts
As a durable, cost-effective, and highly protective roofing material, fiberglass shingles are the right choice for many homeowners. With the right prep, attention to detail, and careful installation – we know your fiberglass shingle DIY installation project will be a smashing success!