Updated 10/3/2026
Plywood countertops are a good fit if you want warm wood tones on a budget and don’t mind doing the work yourself.
A single 4′ x 8′ sheet can cover a long run of cabinets with no seam, and you can finish it to match your kitchen.
Plywood does have limits. It isn’t waterproof, so it only holds up if you seal every surface well. It also scratches and dents more easily than stone, and hot pans can damage the finish.
With sealing and basic care, though, it works well in kitchens, laundry rooms, workshops, and bathrooms.
What You’ll Need
Materials
- 3/4″ cabinet-grade hardwood plywood, such as birch or maple. Avoid construction-grade sheathing. It has gaps inside and a rough face.
- Extra 3/4″ plywood for edge strips, or 1×2 hardwood boards (they measure 3/4″ x 1-1/2″)
- Wood glue
- 1-1/4″ screws for building up the edge
- Finish nails
- Sandpaper in 80, 120, and 220 grit
- Wood filler
- Clear finish: water-based polyurethane, oil-based polyurethane, or hardwax oil
- Painter’s tape
- Clear silicone caulk
Tools
- Tape measure, pencil, and straightedge
- Circular saw, table saw, or jigsaw (with a fine-tooth blade)
- Drill and drill bits
- Clamps
- Random orbit sander
- Brush or foam applicator
- Safety glasses and a dust mask
Step 1: Measure Your Cabinets
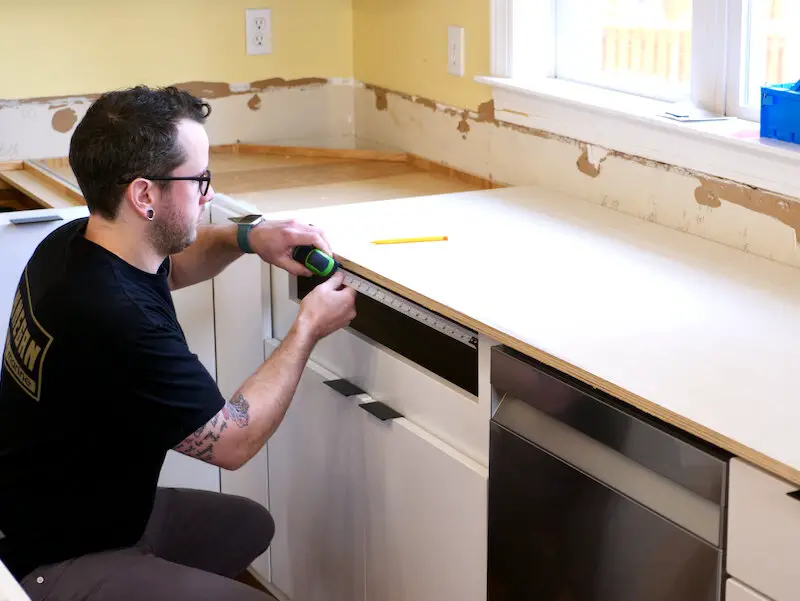
- Measure the length and depth of your cabinet run.
- Add an overhang of about 1″ over the cabinet fronts. Standard base cabinets are 24″ deep, so the top is often about 25″ deep.
- Take the same measurements on both ends of the run. Walls and cabinets are rarely perfectly square.
- If the countertop touches an appliance, plan for the top to cover the cabinet edge next to it.
Step 2: Cut the Plywood
- Mark your cut lines and run painter’s tape along them. The tape helps stop the thin top layer from chipping.
- Cut with the good face down if you’re using a circular saw. Cut with the good face up on a table saw.
- Clamp a straightedge to the plywood as a saw guide to keep the cut straight.
- Make sure the edges are clean and square. Any mistakes here will show in the finished top.
Step 3: Cut the Sink Opening (If You Have One)
- Trace the template that came with your sink, or trace the sink itself.
- Drill a hole inside the line at each corner.
- Cut along the line with a jigsaw.
- Set this cut edge aside for sealing in Step 6. It’s the edge most exposed to water.
Step 4: Build Up the Edge
A 3/4″ top can look thin. Doubling the edge to 1-1/2″ gives it a sturdier look.
- Flip the top upside down.
- Cut plywood strips about 3″ wide to run along the front, sides, and back.
- Spread glue on each strip and clamp it flush with the outer edge.
- Drive 1-1/4″ screws from the strip side. Keep them near the outer edge and don’t let them poke through the top.
- Attach the front first, then the sides, then the back.
For a solid hardwood edge: Cut the plywood top 3/4″ past the cabinet fronts instead of 1″. After the doubling strips are on, glue and nail a 1×2 hardwood strip to the front edge. Fill the nail holes with wood filler.
Step 5: Sand Everything
- Flip the top right side up.
- Sand the edges first so the seam between layers is smooth and even.
- Sand the whole top with 80 grit, then 120, then 220.
- Sand in the direction of the wood grain.
- Fill any gaps or nail holes with wood filler. Let it dry, then sand it flush.
- Vacuum the dust and wipe the top with a damp cloth.
Step 6: Seal and Finish
This step decides how long your countertop lasts.
- Seal every surface: top, edges, underside, and the sink cutout. Sealing only the top lets moisture in from below, which can cause warping.
- Apply a thin first coat and let it dry.
- Sand lightly with 220 grit, wipe off the dust, and apply the next coat.
- Put on several coats. Check the label on your finish for the recommended number and drying time, and don’t use the countertop until the finish has fully cured.
Choosing a finish
- Water-based polyurethane: Dries clear and fairly fast.
- Oil-based polyurethane: Tends to be tough, but adds an amber tint.
- Hardwax oil: Gives a natural look and is easy to touch up, but it takes more upkeep.
If you’ll prepare food directly on the top, check the finish label for food-contact safety once cured.
Step 7: Mount the Countertop
- Set the top on the cabinets and push it back against the wall.
- Check that the overhang is even along the front.
- From inside the cabinets, drive screws up through the corner braces into the top. Pick screws short enough that they can’t break through the surface. The 1-5/8″ screws are a good size for a 3/4″ top over standard corner braces, but test the fit on a scrap piece first.
Step 8: Add a Backsplash
- Cut a strip of 3/4″ plywood about 4″ tall.
- Sand it and finish it the same way as the top.
- Set it on the countertop against the wall and nail it into the wall studs with finish nails.
- Run a thin line of clear silicone caulk along the joint between the countertop and the backsplash.
Caring for Your Plywood Countertop
- Wipe up spills right away, especially around the sink.
- Use trivets for hot pots and pans.
- Use a cutting board.
- Clean with mild soap and a soft cloth.
- Watch for dull spots or worn finish and recoat as needed.
Frequently Asked Questions
How thick should plywood be for a countertop?
Use 3/4″ plywood for most countertops. Doubling the edge to 1-1/2″ gives it a sturdier, thicker look and adds strength along the front. Go thicker, or add support underneath, if the top spans more than a few feet between cabinet supports or will hold heavy items.
What type of plywood is best for countertops?
Cabinet-grade hardwood plywood, such as birch or maple, is best. It has a smooth, attractive face veneer and fewer voids inside, so it cuts cleanly, sands well, and finishes evenly. Avoid construction-grade sheathing, which has a rough face and gaps in the core. Choose a higher face grade if the wood will show.
Do countertops need plywood underneath?
It depends on the material. Laminate and tile need a solid, flat base, usually plywood or MDF. Thick stone like granite or quartz is often installed directly on cabinets, though some installers add plywood under thinner slabs for extra support. Solid wood tops need no base. Check your installer’s or manufacturer’s requirements.
What type of plywood is most commonly used in kitchens?
Birch plywood is among the most common choices for kitchen cabinets and countertops. It’s strong, reasonably priced, and has a light, even grain that takes finish well. Maple and oak plywood are also popular. Whatever the species, look for cabinet-grade hardwood plywood with a smooth face veneer.
Wrapping it Up
A plywood countertop is one of the most affordable ways to bring real wood into your kitchen. With cabinet-grade plywood, a doubled edge, and careful sanding, you can build a top that looks custom without paying for stone or solid wood.
Sealing decides how long it lasts. Coat every surface, including the underside, the edges, and the sink cutout, and give the finish time to cure before you use it.
After that, wipe up spills, use trivets and cutting boards, and recoat when the finish starts to wear.
Plywood isn’t the right pick for every kitchen. If you want something that shrugs off heat, scratches, and standing water, stone or solid surface will hold up better.
But if you want a warm, budget-friendly top you can build in a weekend or two and repair yourself, plywood is hard to beat.