Updated 7/29/2021
Sometimes, figuring out how to rip narrow boards with a circular saw is difficult.
Can you use it to rip some narrow boards? The short answer is yes, you can.
However, it has to be wielded properly to ensure your safety.
If you’re interested in learning how to rip narrow boards with a circular saw, you ought to stick around as we’re about to cover everything you need to know about the topic!
Preparation

Before you dive into ripping any narrow wood, you should be fully prepped. Your safety should always be your first priority. It’s best not to skip preparation, especially if you’re a first-timer.
As such, you should make sure to don your safety goggles, face shields, hand gloves, and any other appropriate personal protective equipment (PPE).
Remember: you’ll be ripping wood, so you must expect splinters of wood flying around. We’d also recommend wearing ear protection. An earmuff should be appropriate.
Furthermore, you should avoid wearing loose clothes. It’s best to opt for something snugger. If you wear something loose, it might get stuck in the spinning blade, which might cause injuries.
Once you’ve donned all of your PPE and taken all of the necessary safety precautions, you should move on to prepping your circular saw.
For starters, you want to get properly acquainted with your saw. A circular saw isn’t particularly beginner-friendly. It’s important that you read an instruction manual and familiarize yourself with how it works.
It’s important to make certain that the saw is in suitable condition. Make sure there aren’t any loose parts. If you’re using a corded saw, ensure that the electric cable isn’t exposed or worn.
You should also make sure that your saw blade can make an accurate cut with a tight kerf.
Additionally, your circular saw blade should be capable of churning out a somewhat clean finish.
You must be very careful around any electrical cords. Corded saws are usually supplied with electrical cords, which can sometimes become a dangerous obstacle.
Always make sure the cable doesn’t get into your path while working to prevent any accidents.
Before continuing, you should adjust your blade’s height, if possible. We’d suggest adjusting your blade to about ¼ inch deeper than the plank’s total width.
This little detail will help make the entire process more effective and efficient.
Now, let’s get to the woodcutting part.
What You’ll Need

To rip narrow boards with a circular saw, you’ll need:
● Circular blade
● Measuring tape
● Any marker
● Clamps
● A worktable
● Saw track
How to Rip Narrow Boards with a Circular Saw

Now that you have your PPE on and your supplies on hand, it’s time to start ripping through some narrow boards. Let’s get to it!
1) Get an Appropriate Platform
Begin by choosing an appropriate surface for support. You could opt for using strips of wood, a work table, foam boards, or even a sawhorse.
We’d suggest using a straight and fairly long slab or piece of wood as a platform. You could even use multiple ones.
The longer they are, the better you’ll be able to work.
If you’re going to use a slab, you need to make sure it’s thicker than the board you’re going to be ripping.
It needs to be more elevated than your workpiece since your saw will be going on the slab.
2) Make a Sample Cut
Don’t dive into cutting any boards just yet. First, you need to make a sample cut to ensure that everything is in working order.
These cuts should be small and quick. By doing this, you should be able to make sure that your blade is sharp enough for continuing.
3) Measure
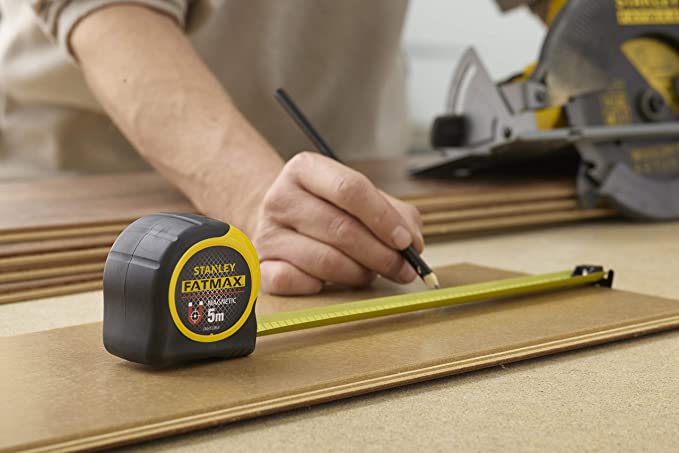
Get your marker and measuring tools out, then proceed to measure the location of your intended cut, marking it in the process.
Remember: you’re working with limited space, so you need to be extremely precise and careful.
Take a minute to look at where you marked your cut. Decide which cut you’ll make first, then second, then third, and so on.
This is important, as it’s not exactly safe to keep considering which cut to make once you start.
It’s better to settle on a predetermined sequence.
4) Get Your Guide
Begin by preparing your guides. Then, get a scrap piece of lumber that’s neither too bulky nor too small.
You want to be able to place it atop your workpiece and secure it. This means that it shouldn’t be unbalanced but shouldn’t be too heavy, either.
After picking out a guide board, you should put it exactly along the area where you marked your cut.
Don’t place it right on top of your marked lines, though. It should be positioned back as far as your saw’s guide necessitates.
To make sure you have everything in its place, put your unplugged circular saw right beside the marked lines.
This will avert any potential misalignments later on.
5) Attach Your Saw Edges
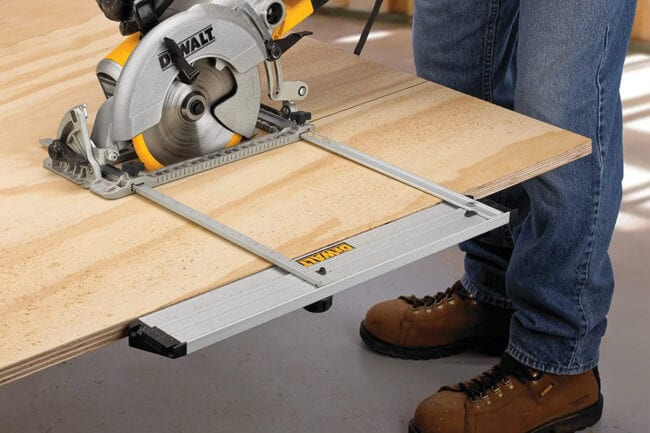
Saw edges will help you make straight, clean cuts. It’s always good to have one when cutting. If your circular saw comes with a saw edge, then attach it to the saw.
If you don’t have a saw edge, you can always purchase one. You can even create a makeshift one by nailing a scrap of wood along your marked lines.
6) Secure the Platform
Once you’ve attached your saw edge and fixed everything in its place, you should secure your platform. This is an essential step, as it’ll prevent your platform from moving during the cutting process.
To secure your platform, you need to use a pair of large C-clamps. Use them to clamp the sole of the saw to the platform at two different points.
The clamps should be tightened down until you’re sure your platform won’t slide or shift when cutting.
If the clamps don’t hold tight enough, then we recommend positioning a few wood bits on the saw sole. This will help the clamp hold the sole better.
If you’re not a fan of clamps, you could alternatively nail down your workpiece with an 8d nail while clamping your guide.
7) Rip Your Board
Now, it’s time to rip your board. Adjust your PPE, get your circular saw on you, and start cutting.
To do this, you should begin by positioning the saw’s blade against the edge of your workpiece.
Then, pull on the trigger to activate it and get it running. Make sure to pull the trigger slowly but firmly.
Bring your circular saw to top speed, and then proceed to make a cut all through your piece’s entire width.
Now, pause and take a look at your alignment. Check if the saw’s guide and your makeshift guide are still in line.
If they’re still in their original position, then reactivate your saw and continue cutting.
Make sure to smoothly slide your saw along your markings. Let the cut pieces fall naturally.
Most importantly, don’t get too impatient. You have to work slowly and carefully. Any expected, small movements made during cutting can cause a problem.
Finally, repeat the previous step for every line you’ve marked until you’re finished.
8) You’re Done!
Now that you’re done, it’s time to wrap things up.
Turn off the circular saw and disconnect it. Then, put it away in a safe place where kids or pets (if you have them) can’t reach it.
Make sure to clear all the wood dust and any sharp scrap pieces. Be sure to also dispose of any wood pieces.
Tips & Tricks to Remember

If you’re a first-timer, ripping through a narrow board can already seem a bit daunting.
But even the most proficient woodworkers occasionally make mistakes that cause this task to become hard.
One such example of this is woodworkers who don’t secure their workpieces. No matter how many years of experience you have under your belt, it’ll always be best to secure your workpiece.
If you don’t, there’s a big chance that your cut will come out crooked and curved. This is why you must never skip securing your workpiece.
This applies to any guides you’re using as well. No one wants their guides to shift or move mid-cut.
It’s also important to make sure that your blade is sharp. If it’s not, then it could cause splinters and produce ugly, awkward cuts.
Make sure that the blade of your circular saw is sharp. Blunt blades may cause splinters, ugly cuts and will reduce the general efficiency of the machine, especially when cutting chipboard.
If you change it, make sure to disconnect your saw first.
When you’re cutting, we suggest that you stand on one side of the saw. This will help prevent cutbacks and give you an overall easier experience.
Alternatively, you could ask a friend to help you. If they move along with the workpiece, you’ll be able to cut without suffering any kickbacks.
Also, it’s best to put your guide against the side of the board you want to keep. This way, you won’t cause damage to the piece you want to keep if your saw veers off from its intended path.
Wrapping it Up
We assure you that learning how to rip narrow boards with a circular saw isn’t as challenging as it seems. Just be sure to take all necessary safety measures to ensure a smooth and safe experience.
Good luck!
Related Posts:


