Updated 9/13/2023
Scroll saws may not be the most popular tool for everyday woodworking, but they’re quite handy when it comes to turning a dull, basic wood project into a work of art.
I’m talking about creating unique decorations of scroll saw patterns, which is now easier than ever, thanks to the assistance of various devices.
If you’re a woodworking newcomer, this list is definitely for you!
We’ve assembled a selection of easy scroll saw patterns for beginners to help you make your own in no time.
Easy Scroll Saw Pattern Ideas for Beginners
These fun scoll saw patterns don’t involve too many steps, so you should find them pretty easy to complete. Let’s get started!
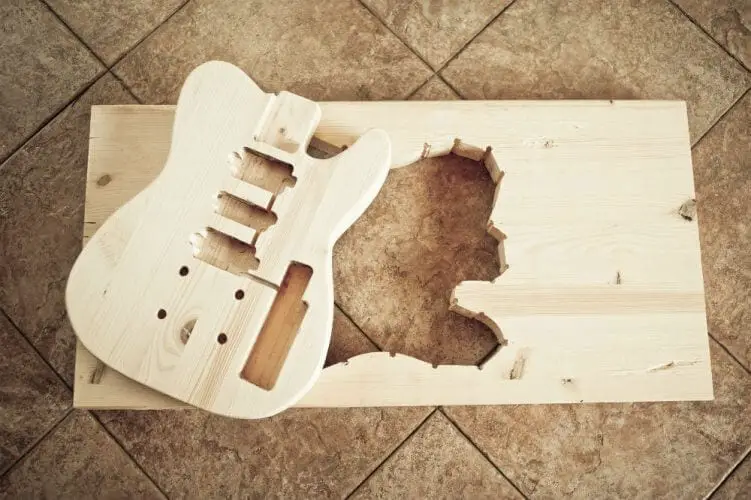
1) Bigfoot Scroll Saw Pattern

Granted, this might look silly, but bigfoot scroll saw patterns are some of the most straightforward patterns you can try if you want to get used to making cuts with your scroll saw.
In this case, they’re extremely popular among beginners or those who are just interested in the elusive ‘Squatch.
The lines required to create a bigfoot pattern are super simple, as you can see, it’s basically one long outline of a hairy body.
Due to its minimal design, bigfoot scroll saw patterns are available in a range of sizes, and as tall as 93 inches.
2) Pokemon Scroll Saw Patterns
Unless you’ve been living under a rock, chances are you’re familiar with the popular Pokemon franchise.
No, I’m not joking. I never joke about woodwork.
Actually, that’s not true. I know a ton of woodworking puns and jokes.
Anyway…whether you’re a die-hard fan or know someone who is, Pokemon scroll saw patterns can be an excellent way to get introduced to the world of scroll sawing.
Check out this cheerful Pikachu winking playfully with his arms in the air. The lines required to complete the body are super simple, but the eyes will slightly challenge your novice skills.
Don’t worry- it’s much less complicated than it looks. You’ll just need practice making rounded-edge cuts.
If you’re Team Charmander, then you’ll probably love this pattern. This happy-looking fella is actually pretty easy to create with a scroll saw.
The body and the eyes are practically effortless, and you can either cut out the belly or shade it with some color.
Perhaps the only tricky bit is the flame at the tip of the tail, but keeping a steady hand should do the trick!
Alternatively, you may want to make a Squirtle pattern first since it doesn’t have any sort of remotely elaborate detailing.
You can also try your hand at making a basic Pokeball. It’s a straightforward process that requires clean lines with a bit of a curving game.
3) Free Native American Scroll Saw Patterns

Native American designs are extremely popular patterns for scroll saw projects, particularly beneficial for beginner woodworkers looking to sharpen their skills.
At first, it may be difficult to pay for patterns to download, so it’s smart to search for free native American scroll saw patterns.
To give you a head start, you can use this native American pattern by Arpop. The pattern depicts one side of the face of a Native American wearing a traditional war bonnet.
This pattern offers a nice combination of clean and uneven lines, which intermediate-level woodworkers highly appreciate.
It’s not the easiest pattern to create, but it’ll look absolutely stunning once you’re done.
Another free pattern by Arpop is a native American rocking the signature double-braid hairstyle.
This is a much simpler approach compared to the war bonnet design. Alternatively, you can go for a majestic eagle pattern with flames around its head.
We recommend you use the removable adhesive paper method with such patterns as they feature many details that are hard to replicate by hand-tracing, so you need to make sure you get them on paper correctly.
4) Kitchen Items Scroll Saw Patterns

A wonderful way to get into scroll sawing is to make stuff you can use around the house.
One kitchen item that’s particularly easy to achieve is a cutting board. You can try making your own version based on the printable pattern from Steve Good, which is simple yet effective in helping you learn how to execute clean cuts.
It also comes with a few curves, allowing you to practice cutting soft, rounded edges.
The best part about this pattern is that it’s barely affected by mistakes. After all, it’s just a cutting board that’ll stay perfectly functional even with a couple of slips.
If you’re looking to raise the difficulty level to improve your skills, you can try making a trivet.
Now, there are many patterns that you can apply for such a project, but we do recommend a triple maple leaf design similar to what Home Hardware Stores offers.
This pattern isn’t entirely complicated, but it’s tricky enough to challenge your scroll saw capabilities.
It does provide a decent window of error since the outlines of the leaves are pretty wavy.
5) Geometric Scroll Saw Patterns

If you’re planning on mastering how to cut with a scroll saw, then you need to be able to create basic geometric shapes using the machine.
Granted, you may not be making patterns out of these simple shapes alone, but the techniques you’ll learn while cutting them will be the real win here.
A fantastic project to kick start your training is making a shapes puzzle.
Not only will this allow you to practice multiple shapes on the same wood blank, but it can also serve as an educational toy for young kids.
You can either add a backing on the puzzle to keep the shapes from falling through or leave them open.
A shapes puzzle won’t take you much time to complete, so it’s an easy pattern to make repeatedly for practice.
Moreover, you can print or trace the pattern by hand – it’s just that simple.
Instead of making basic internal cuts, you can try making this Santa mobile, which involves shaping the exterior of wood until it becomes a certain geometrical pattern.
This is a different set of skills that’ll help you develop some advanced scroll sawing techniques.
How to Design Your Own Scroll Saw Patterns
Working with ready-made images like the ones we listed above is surely convenient since all you need to do is download the picture, print it, then attach it to the wood for cutting.
But after completing a bunch of projects, you’ll probably find yourself wondering how to design your own scroll saw patterns to showcase your creative side.
You’ll want to convert some pictures into a scroll saw pattern.
While there are multiple ways you can achieve this, using a photocopy machine remains one of the most effective yet affordable methods to design your own scroll saw patterns.
You’ll get to make black and white representations of images and scale them up or down depending on the specifications of the project at hand.
Before you jump into action, ensure you have all the required tools.
Here’s what you’ll need…
- A picture of your design
- A photocopy machine
- Graph paper
- Carbon paper
- Pen
Step 1:
You should first create the design you want to work with on a piece of paper.
After that, put the picture on the photocopy machine and adjust the settings to make either an enlarged or a reduced copy, matching your needs for the scroll saw project.
Adjust the machine settings until you get the correct size, which may take a few trials to land perfectly.
Step 2:
Now, place the graph paper over your work surface and align the carbon paper on top of it, with the carbon side down.
Then, grab the photocopy of your design and position it over the carbon paper.
Step 3:
Using a pen, trace the design lines that you want to include in the final pattern.
Remember, you should be realistic about the amount of detail you can achieve with the scroll saw.
Don’t go overboard; include the minimum number of lines necessary to build a comprehensive shape.
If you’re having trouble keeping the carbon paper in place as you’re tracing, you can use tape to fix it down, so you end up with clean lines.
The photocopy will be a general guideline to help you create your pattern.
Once you’re done tracing the lines, remove the photocopy and the carbon paper. The resulting image on the graph paper is your pattern.
Tip: Make several copies of the pattern and store them away. You may need to use it again later on.
Step 4:
Place your pattern on a sheet of carbon paper, then position both papers over the wood blank you’re planning to use for your scroll saw project.
Proceed to trace the lines of the pattern with a pen, transferring your design to the wood blank (you can also use removable adhesive paper, more on this later).
Finally, cut out the pattern on the wood blank using a scroll saw and… voila!
Best Plywood for Scroll Saw Projects
Regarding the type of wood you can use for scroll saw projects, plywood is highly recommended, especially if you’re a beginner.
Plywood has decent tensile strength and is very stable on your cutting table since it’s built to be highly dense.
It’s weatherproof, waterproof, hard-wearing, and extremely durable. This makes it an excellent choice for scroll saw projects that you intend to keep outdoors.
Additionally, plywood is more eco-friendly than real lumber because it’s made out of recycled plastics (plywood itself is recyclable).
Baltic birch plywood is an excellent example of plywood that’s suitable for practicing your woodworking skills and produces beautiful patterns if you’re serious about what you created.
Unlike most plywood with a four or five-ply construction, Baltic birch has a nine-layer construction – making it the most durable type of plywood available.
It’s stiff and permanent, with an even balance from the center layer thanks to the uneven number of layers.
Check out my review of other types of wood for scroll sawing here!
Removable Adhesive Paper for Scroll Saw Patterns
Once you’re set on a particular pattern to create, you’ll need to transfer it to the wood blank so you can cut it with a scroll saw.
As we mentioned above, you can use carbon paper to trace the design lines onto the wood blank.
However, hand-tracing a pattern directly on the wood can be problematic for scroll saw beginners.
This is why many woodworkers recommend using removable adhesive paper for scroll saw patterns.
Applying this method, you can redo the tracing until it’s perfect without worrying about slight movements that may ruin the pattern.
After that, you’ll be able to adhere the pattern directly to the wood blank, and start cutting with maximum precision.
If you don’t plan on tracing, you can print the pattern image directly on the adhesive paper using the photocopy machine, then stick it on the wood blank and start cutting.
This is a quick and straightforward approach to apply patterns cleanly while ensuring they’ll stay in place during cutting.
To use removable adhesive paper once you’ve got the pattern on it, you’ll only need to peel off the backing, lay the paper over the wood blank, and press down firmly to ensure it’s properly stuck.
As you can probably tell, there’s no need for additional tape here. Moreover, the adhesive in the paper helps lubricate the blade and prevents burning, deeming this method both practical and valuable.
Frequently Asked Questions
How do I turn a picture into a scroll saw pattern?
You can turn a picture into a scroll saw pattern in a few different ways. One method is to use a computer program to create a vector graphic of the image. This can be done using software such as Adobe Illustrator or Inkscape. Once you have created the vector graphic, you can then save it as a PDF or EPS file, which can be imported into a scroll saw pattern program such as Vectric Aspire or CorelDraw.
Another way to create a scroll saw pattern from a picture is to trace the image onto tracing paper and then transfer it onto the graph paper. You can then use the grid lines on the graph paper to help you create the pattern. Once you have finished tracing the image, you can then scan it into a computer and save it as a PDF or EPS file.
Whichever method you choose, once you have your scroll saw pattern, you will need to print it out and transfer it onto the wood. You can either trace the pattern onto the wood with a pencil or use carbon paper to transfer the design. Once the design is transferred, you can start cutting it out with your scroll saw!
How do you make a scroll saw puzzle?
To make a scroll saw puzzle, start by tracing a simple design onto a piece of wood. Then, use a scroll saw to cut along the lines of the design. Once the puzzle is cut out, sand the edges smoothly and paint or stain the wood if desired. To assemble the puzzle, start by gluing one side of each puzzle piece to the main board. Then, glue the other side of each piece to its neighbor. Allow the glue to dry completely before displaying or playing with the puzzle.
How do you stick patterns to wood?
Wood glue is a type of adhesive specifically designed for bonding wood. It is made from a resinous substance that hardens when it dries, creating a strong bond between the pieces of wood. Another option is to use hot glue. Hot glue is a general-purpose adhesive that can be used on various materials, including wood. It works by melting the adhesive and then cooling and hardening as it cools, forming a strong bond. Finally, you can also use double-sided tape. Double-sided tape is a pressure-sensitive adhesive applied to both sides of the tape. When pressure is applied, the adhesive bonds the two surfaces together. Double-sided tape can be used on many different surfaces, including wood.
What is the best wood for scroll saw patterns?
The best types of wood for scroll saw projects include:
Cherry: Characterized by its reddish-brown color, cherry wood has an even grain, making it smooth to cut and ideal for detailed projects.
Walnut: Known for its purplish to brown heartwood and nearly white sapwood, walnut provides unique grain patterns and is native to North America.
Maple: Common in North America, maple is lighter in hue compared to walnut and cherry. It’s a popular choice for scroll saw projects due to its affordability and straight grain.
Birch: The yellow birch variety is prevalent in the west. It has a milky, white heartwood with a curly grain, similar in many ways to maple.
Ash: A strong, light hardwood, ash is known for its distinct grain pattern. It’s comparable in hardness to oak and birch.
Hickory: Strong and plentiful, hickory is the hardest among the listed woods. It’s known for wearing out scroll saw blades but offers a beautiful contrast between its paler sapwood and darker heartwood.
Wrapping it Up
There you have it…a selection of easy scroll saw patterns for beginners!
These patterns aren’t just simple to complete by the least experienced woodworkers, but they also look great once you’re finished.
You can use some of them as decorations, toys, or kitchen items.
Once you’re confident in your skills, you can move on to more sophisticated projects involving extra details and complex cuts.
You can even try designing your own scroll saw pattern to unlock your full creative potential!
Special thanks this week to Anuj Agarwal and the folks over at Feedspot for including our site in their “Top 100 Tool Blogs on the Web” list!
Check out all our scroll saw reviews here!
Related Posts:
WEN 3921 16-Inch Variable Speed Scroll Saw Review
Delta Power Tools 40-694 20 In. Variable Speed Scroll Saw Review